If you have covered business expenses with your own funds, you can request a reimbursement directly through Clara. This process ensures your money is returned to your account transparently and efficiently.
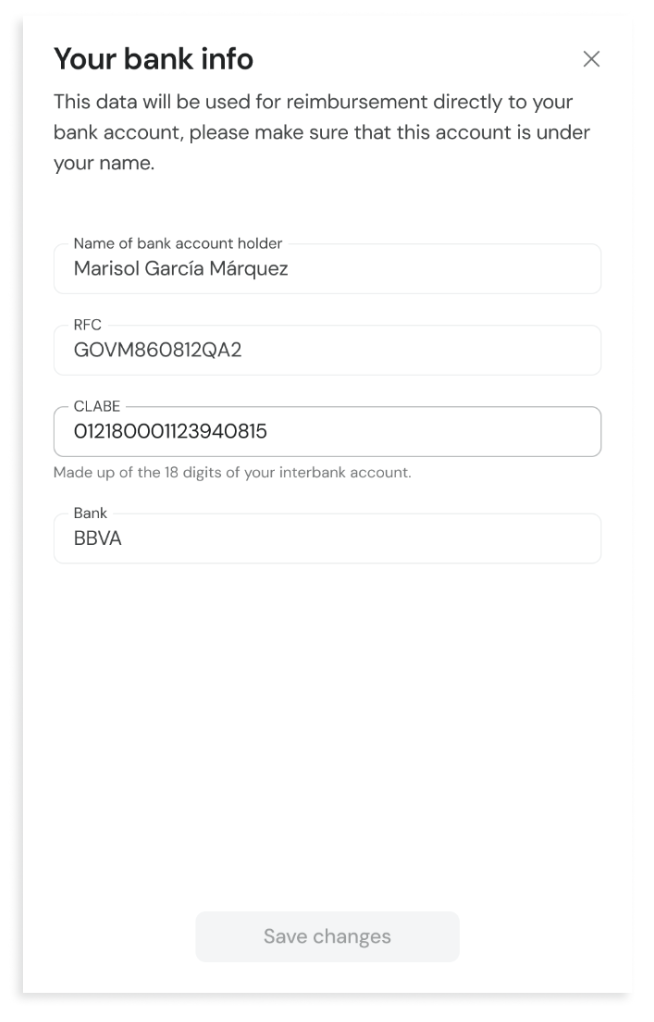
Step 1: Set Up Your Bank Account (One-time setup)
To receive your funds, you must register a bank account under your own name.
Go to the "Reimbursements" section in Clara.
Enter your RFC and your 18-digit CLABE account number.
Save changes. Double-check the numbers to ensure a smooth transfer.
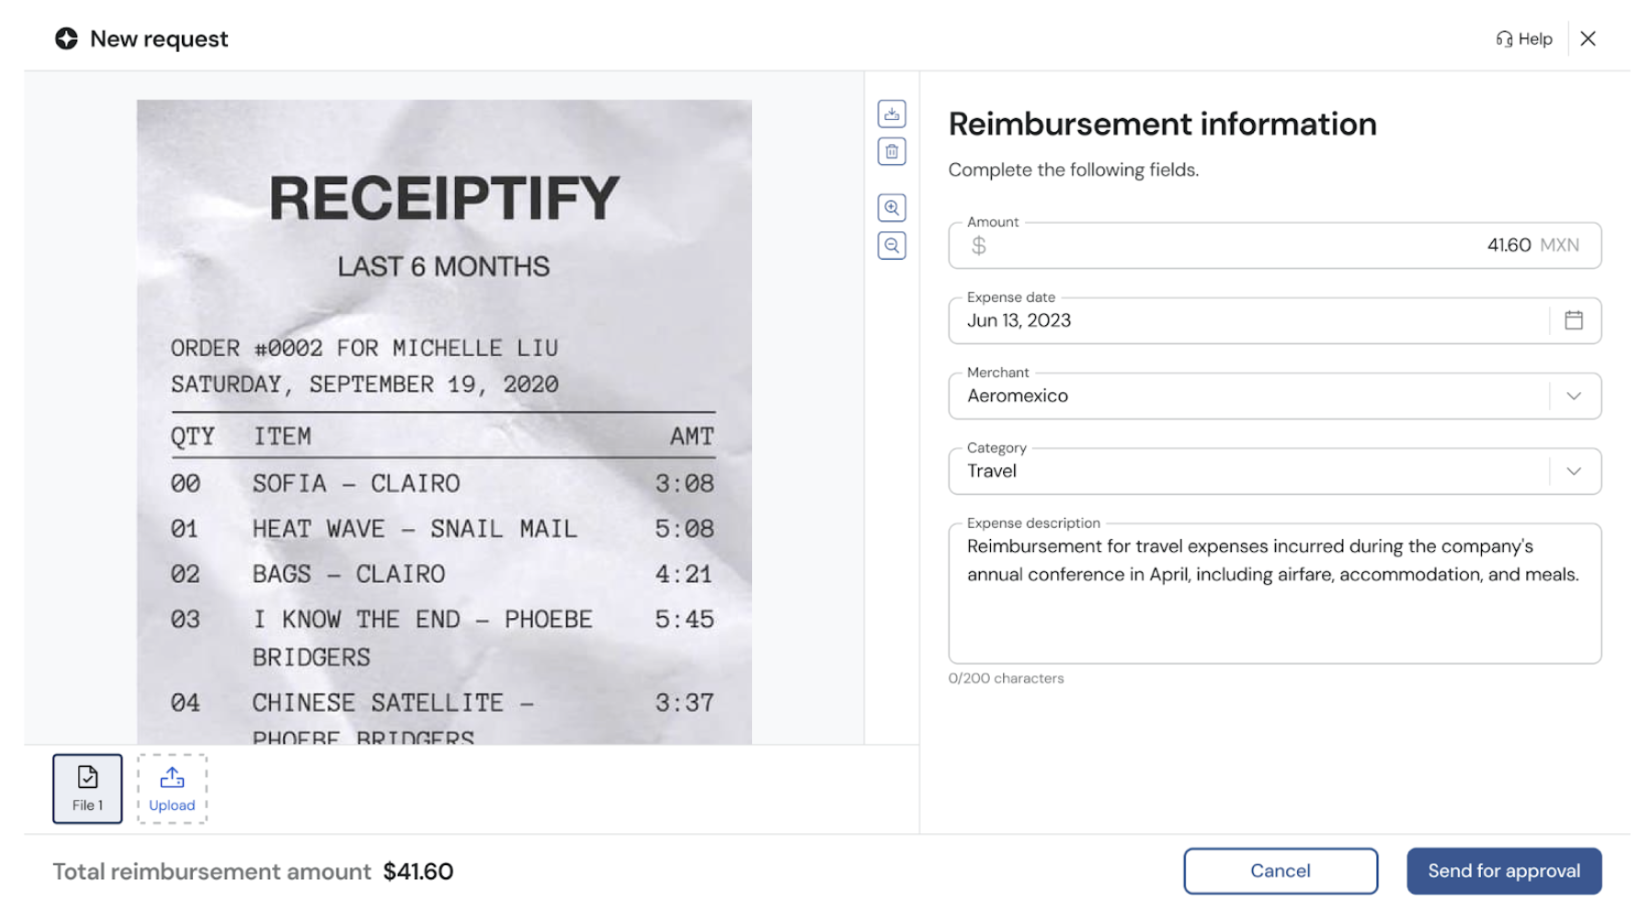
Step 2: Create a Reimbursement Request
Start Request: Click on the "New Request" button.
Upload Receipt: Attach your receipt photo or PDF.
Enter Details: Fill in the amount, date, merchant, and category. Add a brief description of the business purpose.
Submit for Approval: Your request will be sent to your manager for review
Comments
Please sign in to leave a comment.